20th January 2025 - 10 min read
Getting Started with CapCut
If you’re a content creator looking for an easy and powerful video editing app, CapCut is a great choice. Developed by ByteDance (the creators of TikTok), CapCut is a free and user-friendly app available on both mobile and desktop. It offers essential editing tools that allow you to cut, trim, add effects, text, voiceovers, and transitions—all without needing advanced editing skills.
In this guide, we’ll cover the basics of using CapCut, including how to create a project, add subtitles, insert voiceovers, and apply transitions to enhance your videos.
1. Creating a New Project
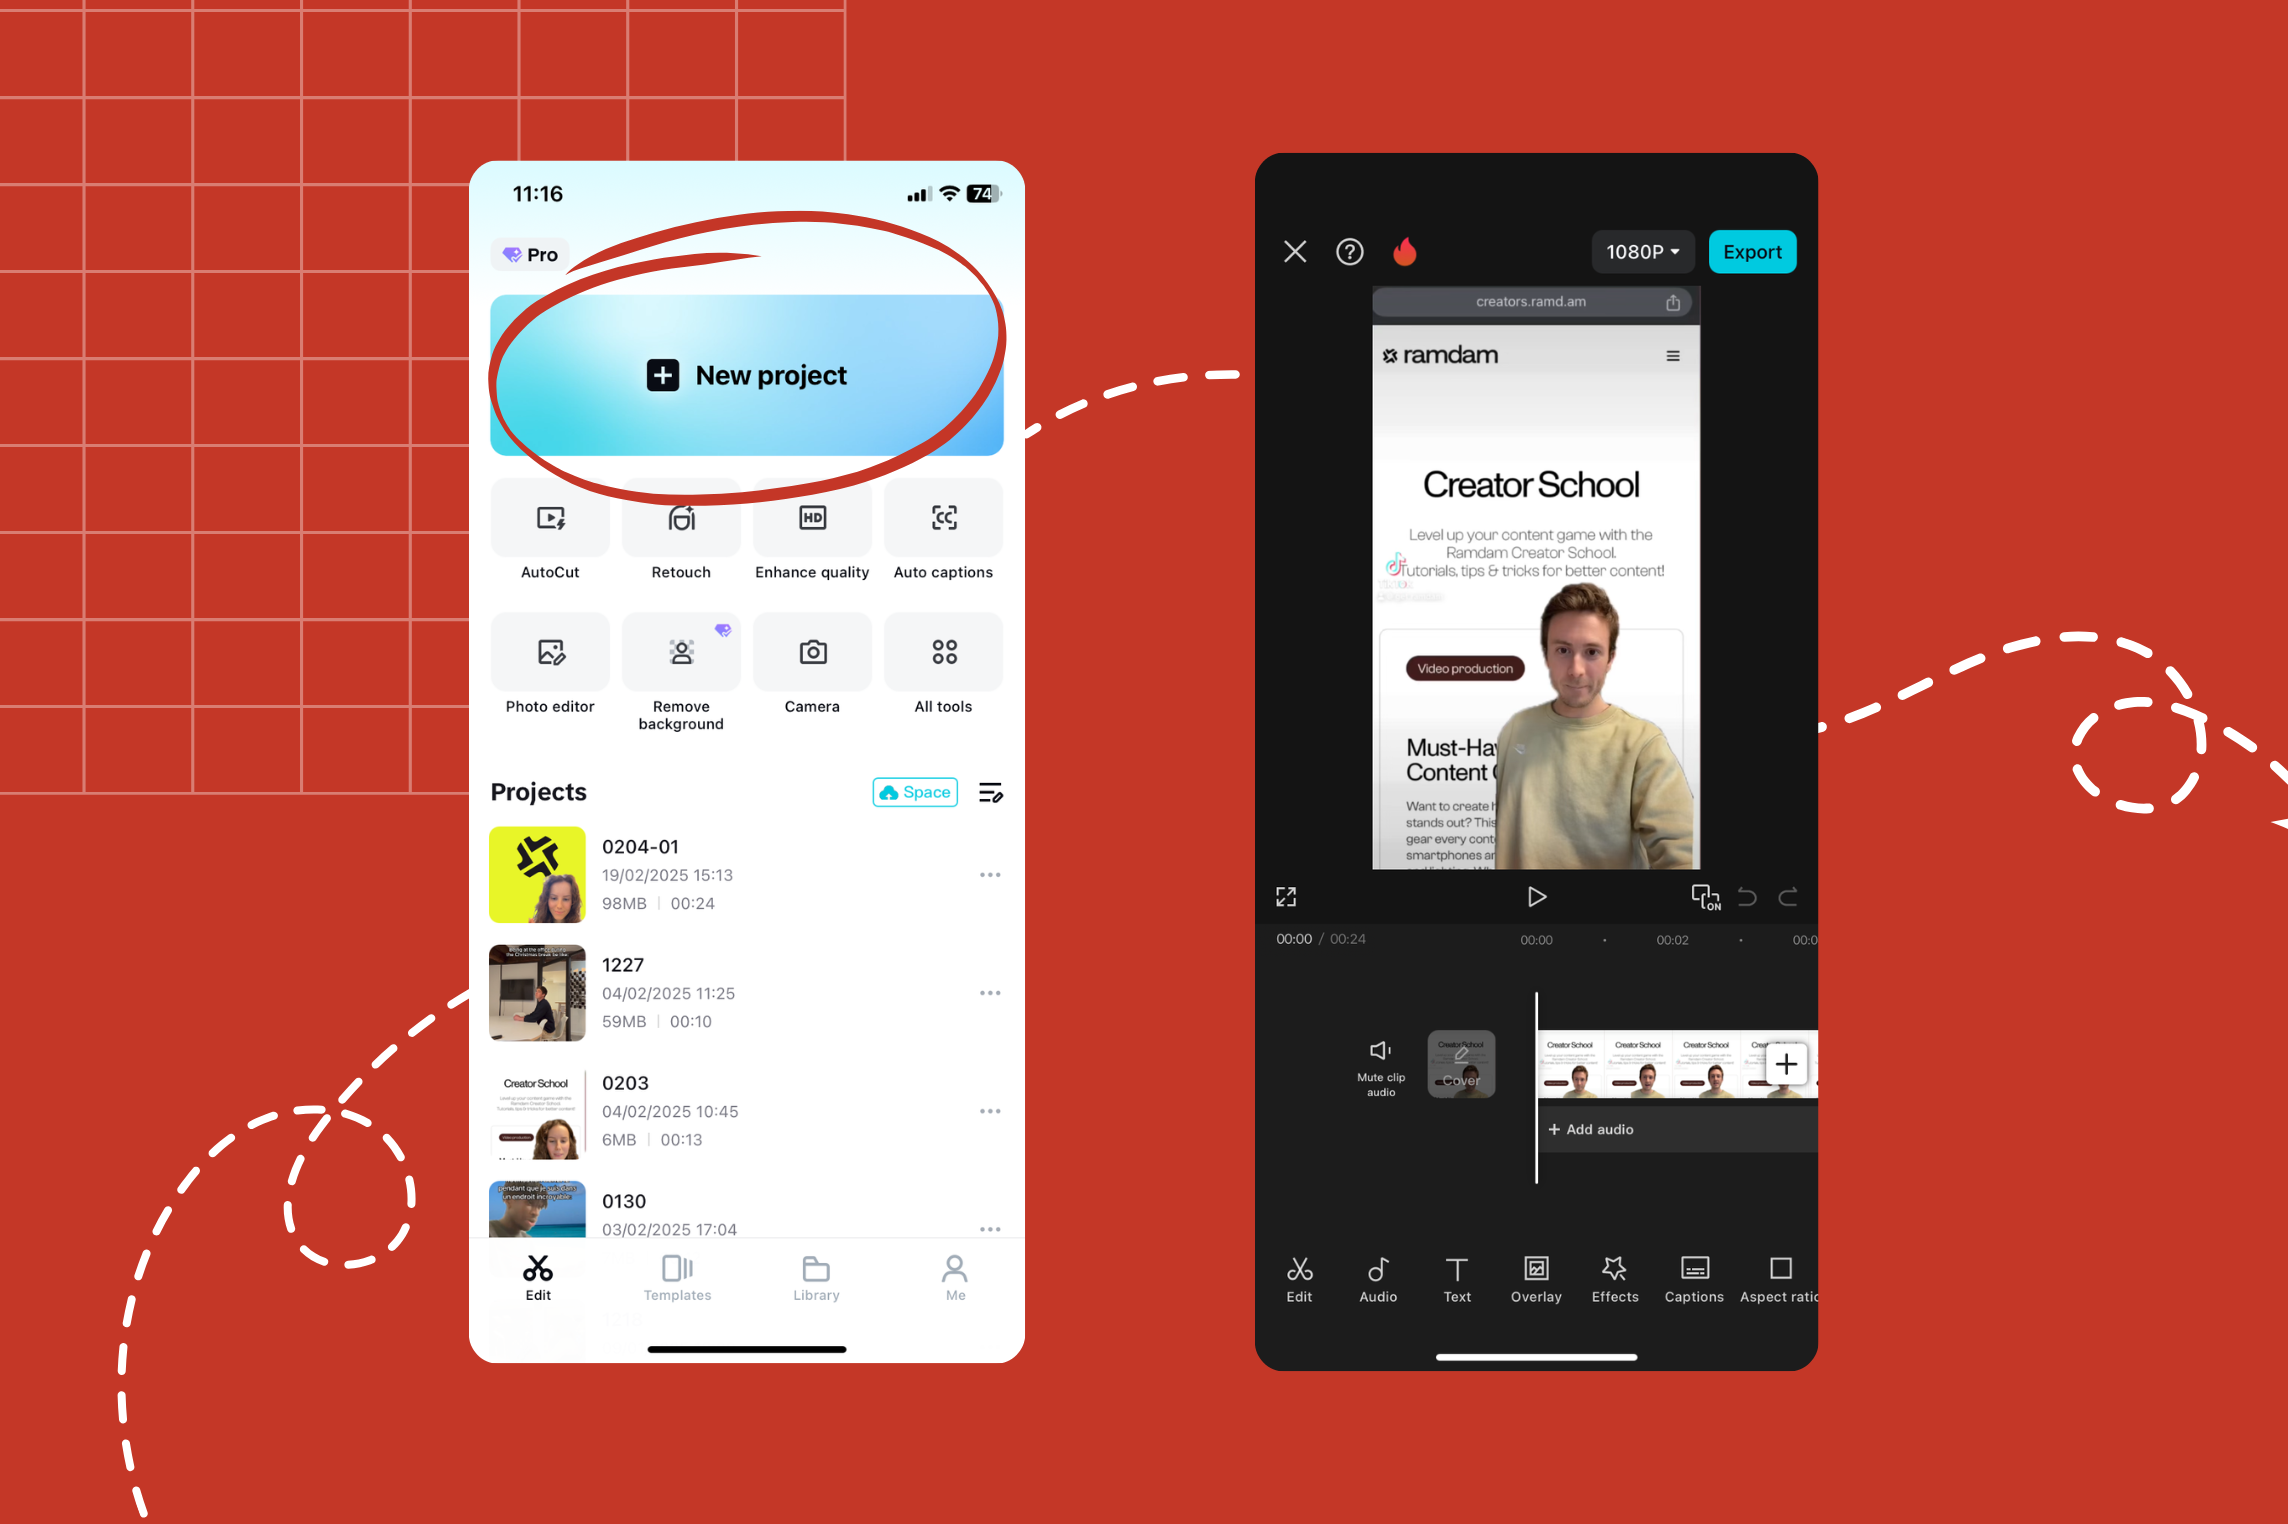
Before you start editing, you need to set up a new project:
- Open CapCut and tap the ”+ New Project” button.
- Select the videos or photos you want to edit from your device.
- Tap “Add” to import them into the editor.
- You’ll now see the timeline where you can begin editing.
2. How to Add Subtitles

Adding subtitles is essential for engagement and accessibility, especially on platforms like TikTok and Instagram, where some users watch videos on mute.
- Tap “Text” in the bottom menu.
- Select “Add text” and type your subtitles.
- Customize the font, size, color, and style.
- Adjust the placement on the screen and the timing on the timeline.
- Use the “Auto Captions” feature for automatic subtitle generation (supports multiple languages).
💡 Pro Tip: Use bold, colorful and dynamic text to make your captions stand out.
3. How to Add a Voiceover
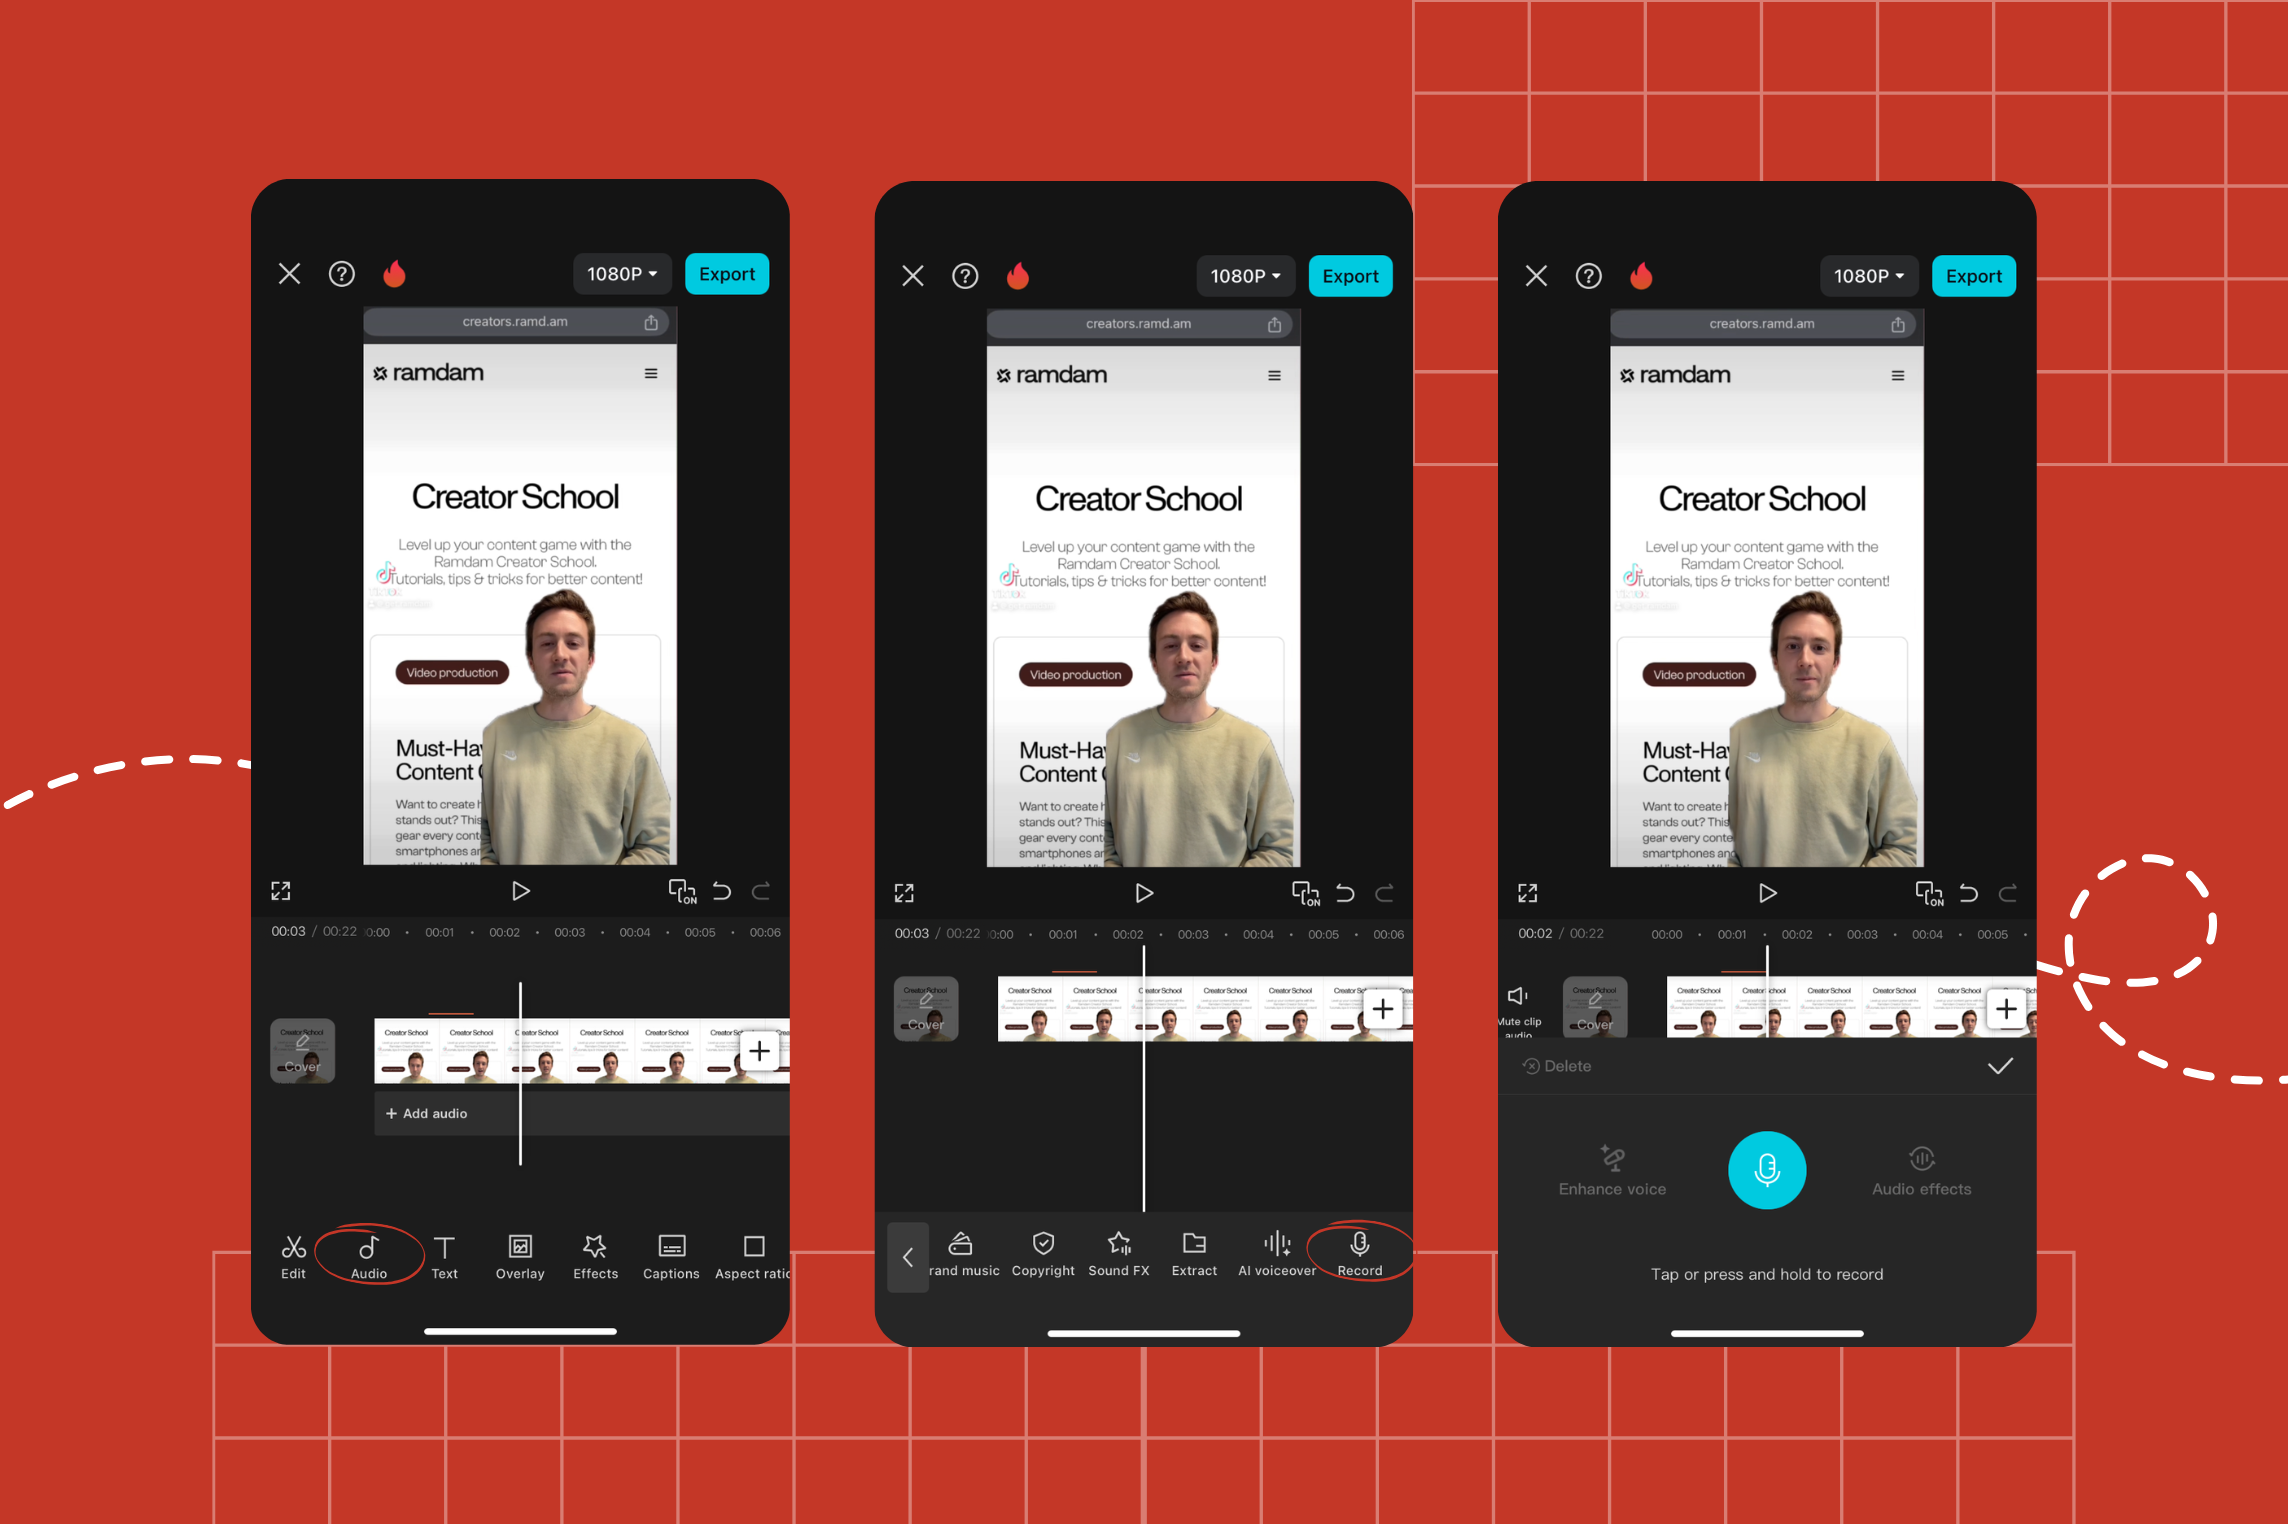
Voiceovers can add personality and context to your videos.
- Tap “Audio” at the bottom of the screen and then“Record”.
- Press and hold the record button while speaking.
- Stop pressing when you're when done and adjust the placement on the timeline.
- Use the “Audio Effects” feature to modify your voice for a unique touch. You can also adjust the volume and speed and add fade effect.
💡 Pro Tip: Ensure you record in a quiet environment for the best audio quality.
💡 Pro Tip 2: If your video has music from TikTok’s sound library, avoid adding additional music in CapCut, as TikTok might mute or restrict the audio.
4. How to Add Transitions Between Clips
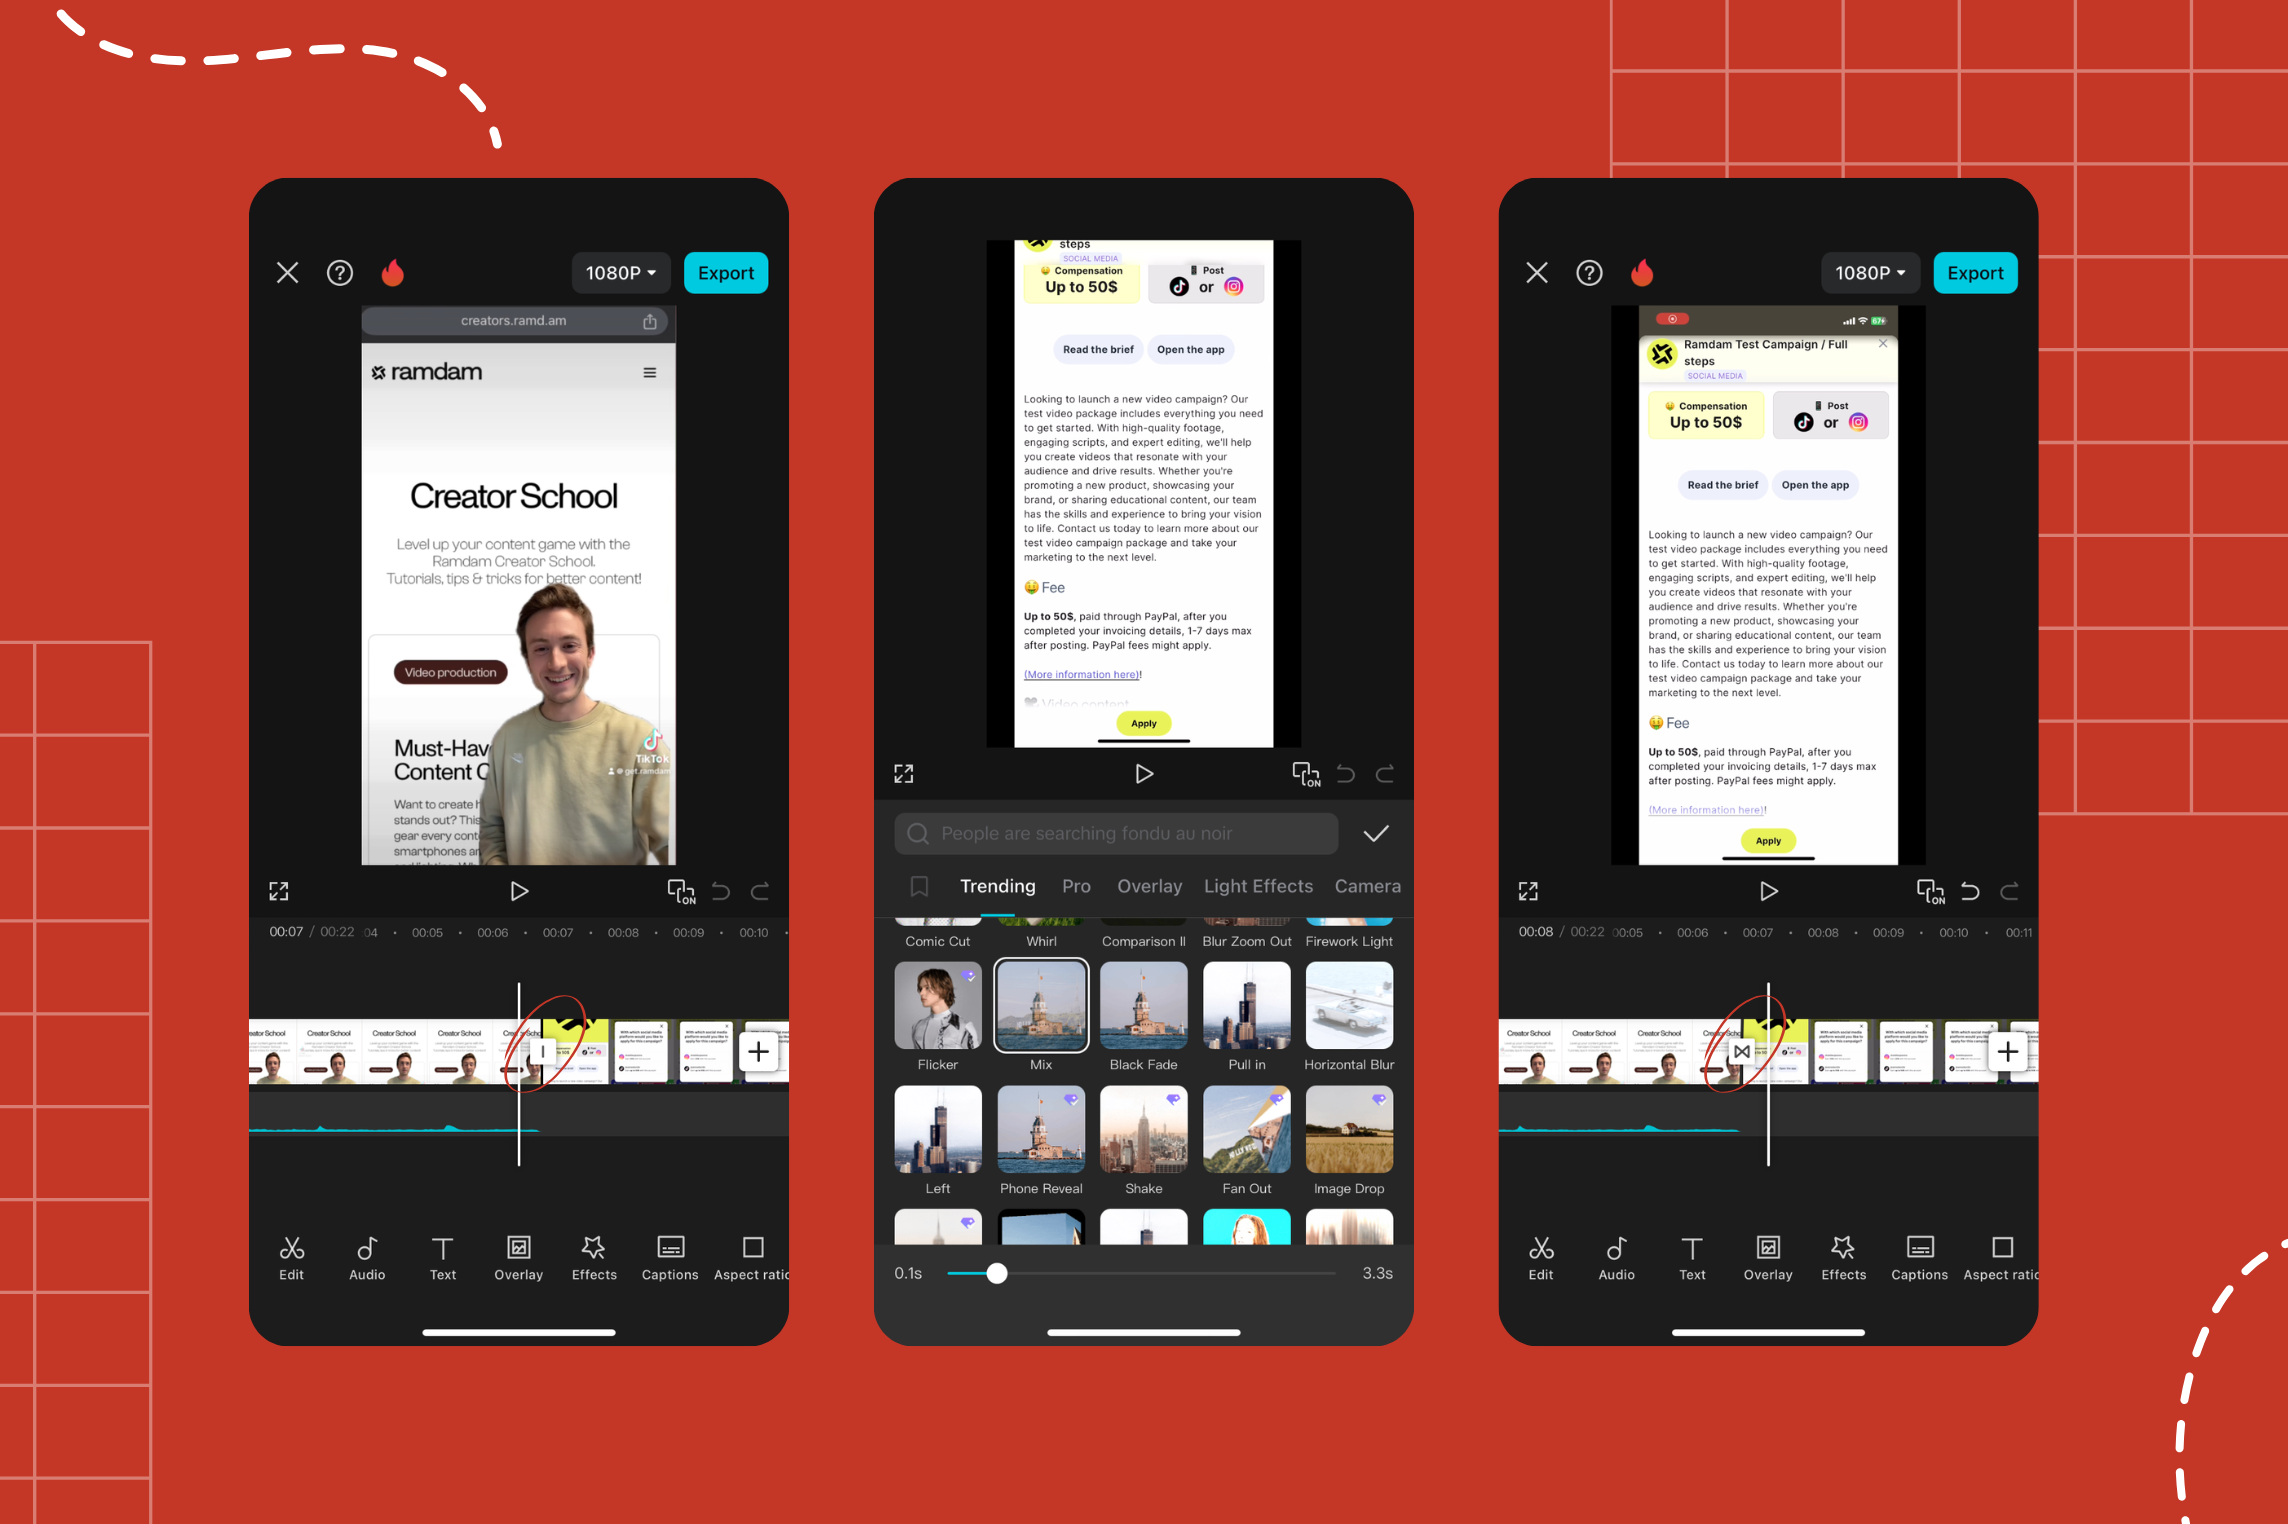
Smooth transitions can make your videos look more professional.
- Tap on the cut between two clips on the timeline.
- Browse and choose from effects like Fade, Swipe, Glitch, or Zoom.
- Adjust the duration of the transition for a seamless effect.
- Tap the check mark to apply.
💡 Pro Tip: Don’t overuse transitions—keep it simple for a clean and engaging edit.
5. Exporting Your Video
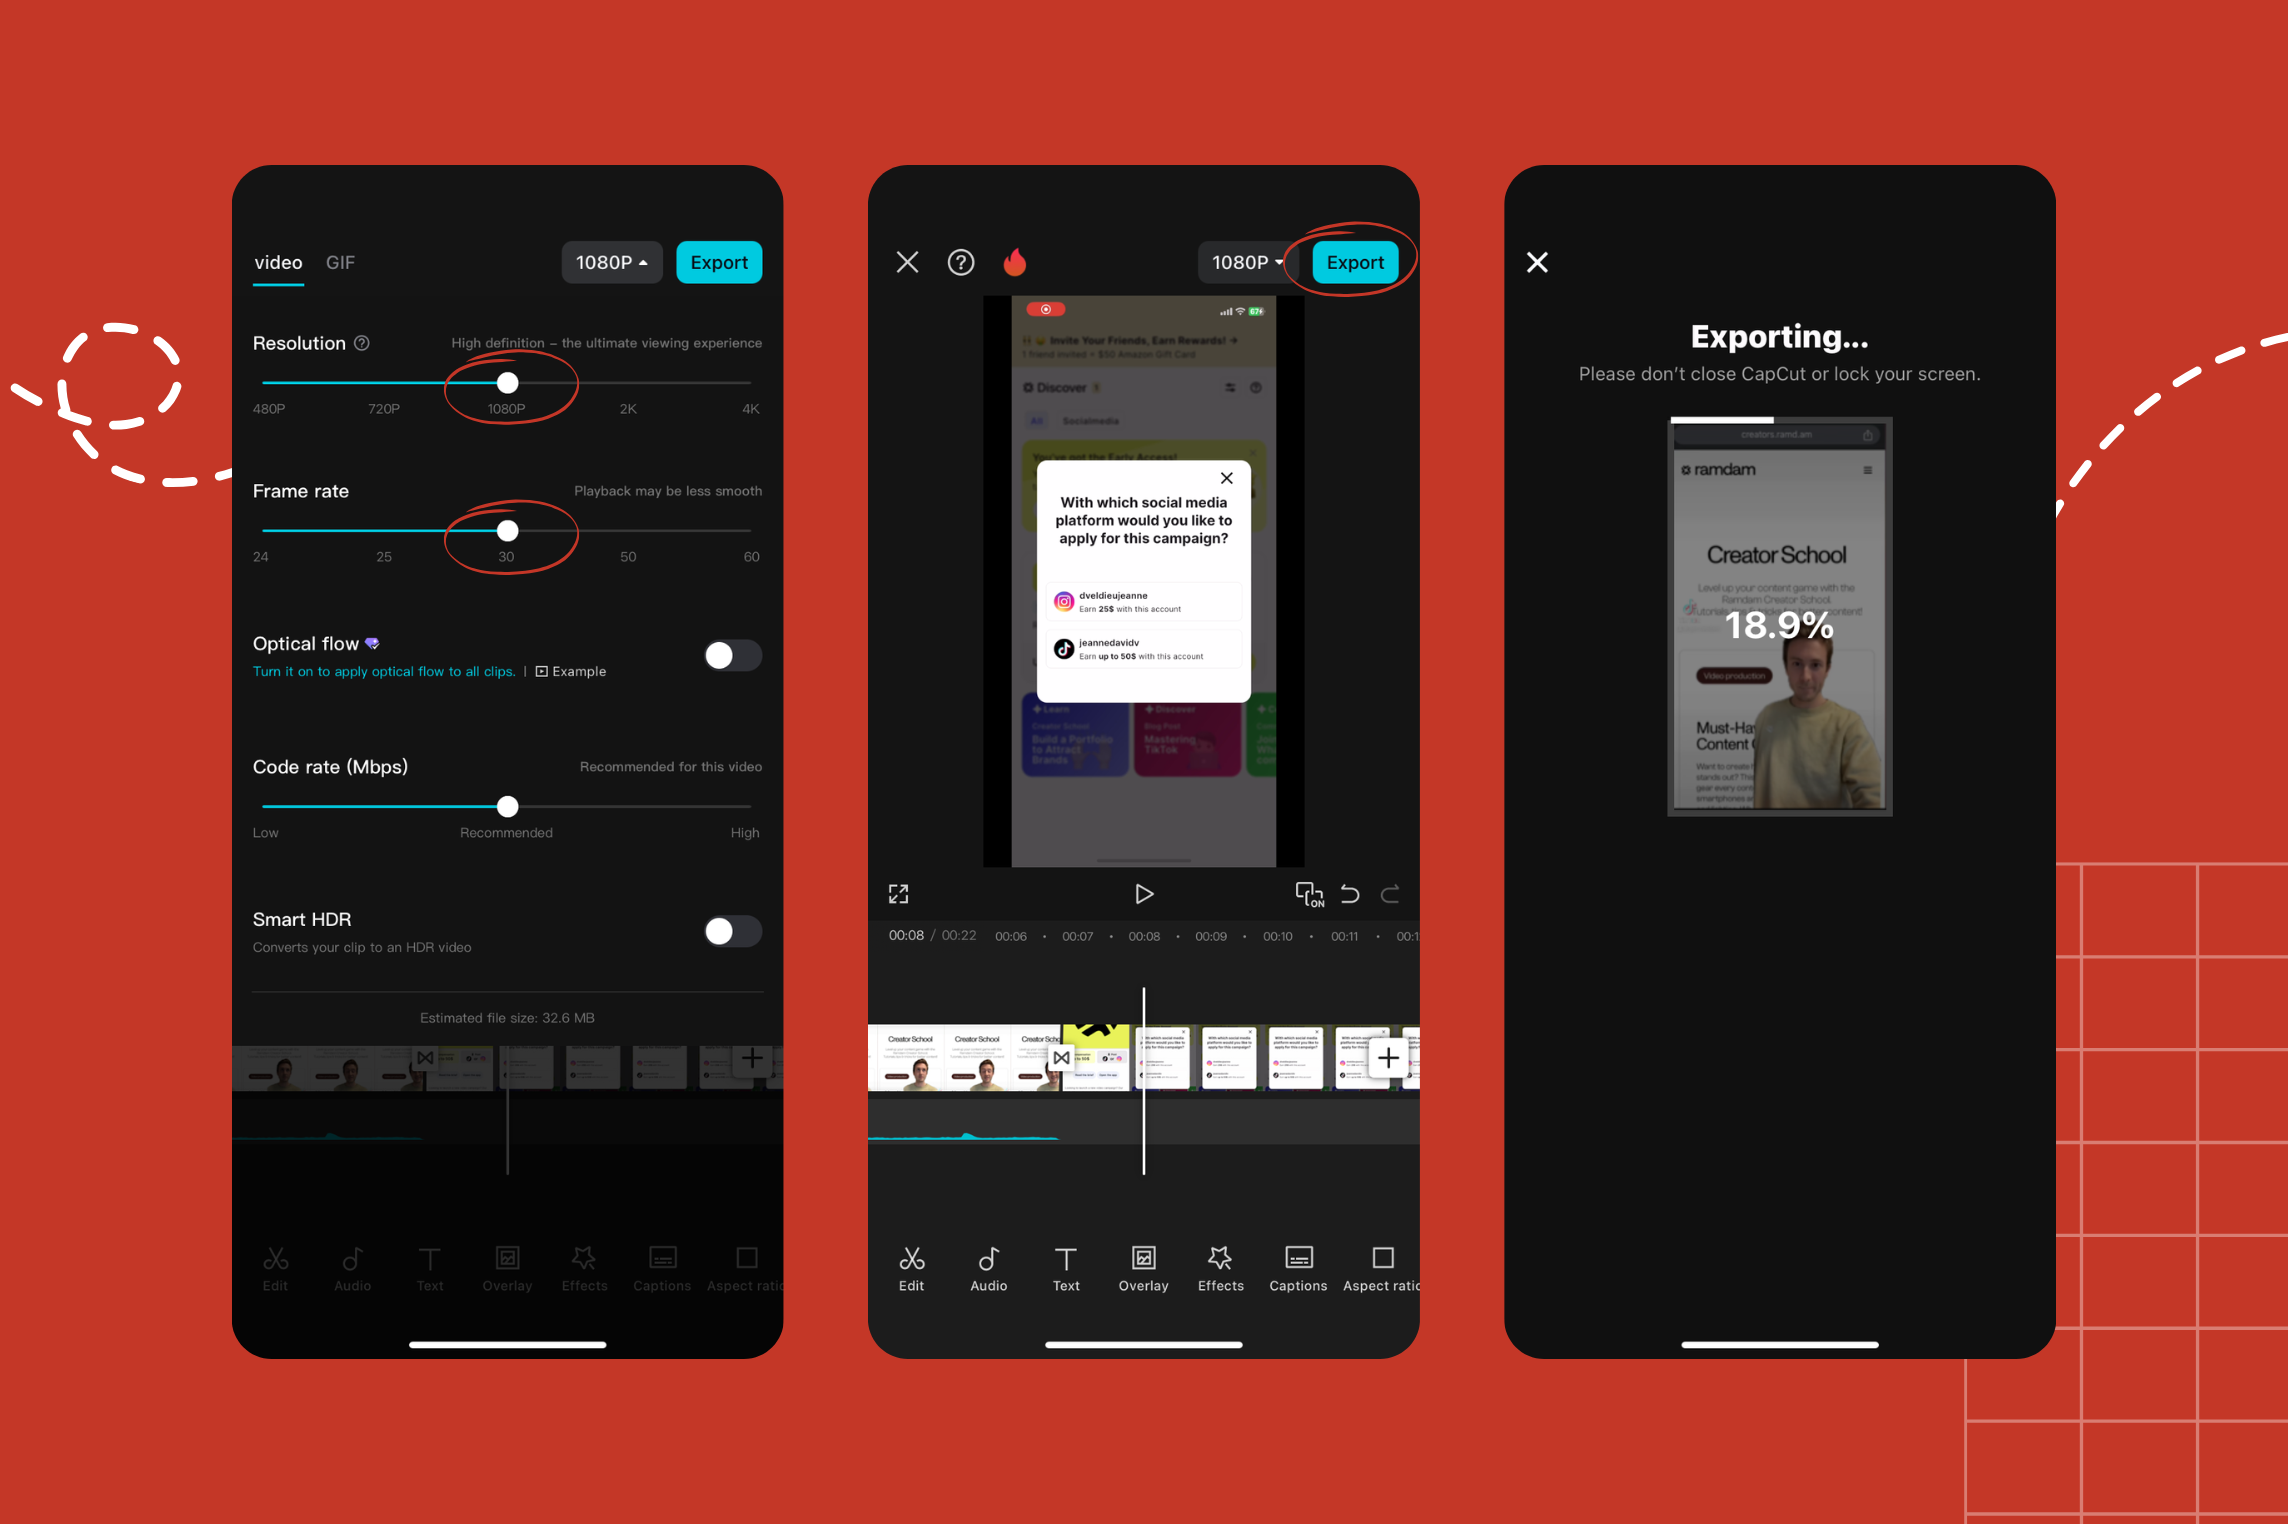
- Once your editing is complete, choose your preferred resolution and frame rate (next to the export button)
- Close, tap Export and wait for the process to complete.
- Your video is now saved to your device and ready to be shared on social media.
Recommended Export Settings
To ensure the best video quality and performance, it’s important to export with the right settings. You should aim for at least 1080p and 30 fps (frames per second). Always use a vertical ratio (9:16) and MP4 format for best compatibility.
CapCut is an excellent tool for beginner content creators who want to edit videos quickly and efficiently. With these basic functions, you can enhance your videos, making them more engaging and professional.
But this is just the beginning! CapCut offers many more features, such as advanced effects, speed control, keyframe animations, and green screen editing. We’ll cover these in an upcoming article, so stay tuned!
.jpg)


.png)


.png)

.png)